Printing the Arthas Helmet: A 1:1 Cosplay Piece from Warcraft
How a full-size Arthas Menethil helmet from Warcraft is 3D printed: splitting the model, marble filament, assembly, finishing and what to expect when ordering.
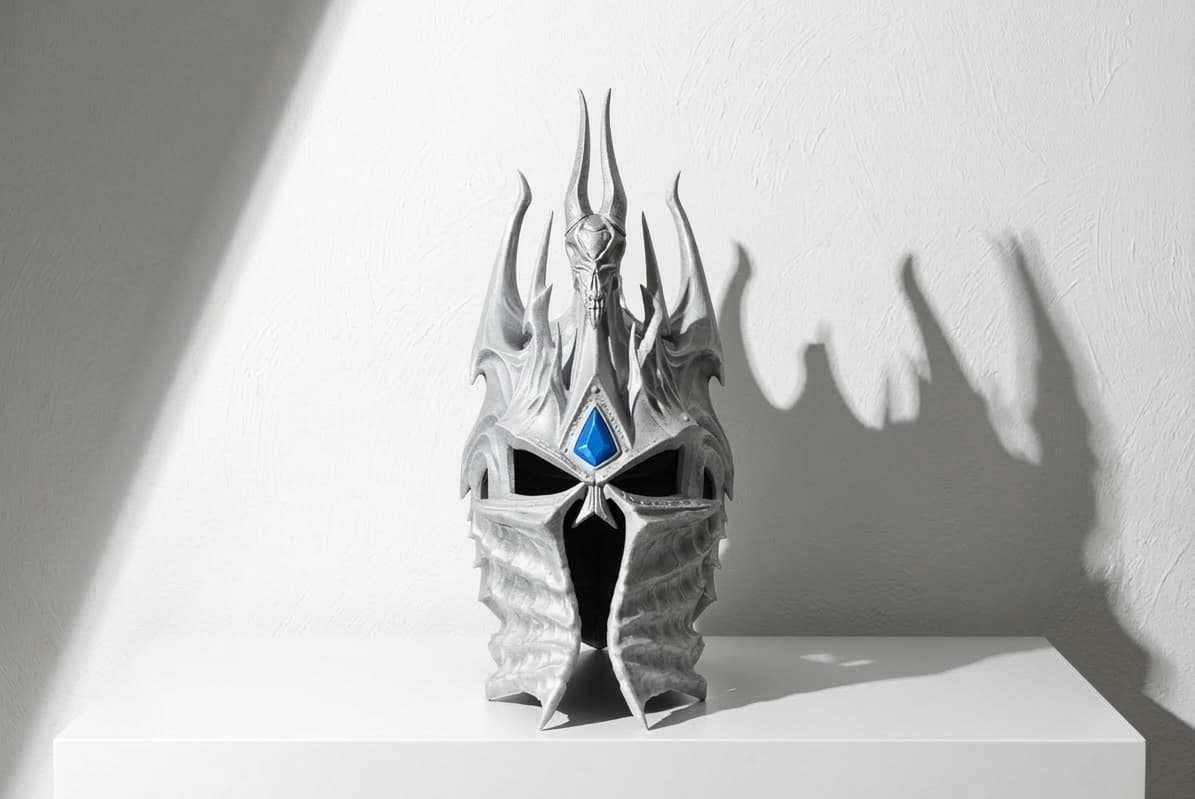
The Lich King's helmet is one of the most recognisable silhouettes in gaming: a skull-like faceplate, sweeping horns and a crown of jagged spikes. Fantasy Lab 3D has printed it at full 1:1 scale, and this post walks through how a piece like that comes together, from the digital file to the finished object you can hold. If you are thinking about a wearable or display helmet of your own, this is what the process looks like.
Why the Arthas helmet is a good test of a 3D printing studio
A wearable helmet is not a small figurine scaled up. It has to be large enough to fit a human head, light enough to wear for hours at a convention, and strong enough to survive being packed, carried and bumped. The Arthas design adds long, thin horns that stick out well beyond the head, so the geometry is awkward to print in one piece and easy to snap if the material is wrong.
That combination of size, thin features and cosmetic finish is exactly where a studio with real experience shows. Anyone can press "print" on a helmet file. Getting it to fit, look right and last is a different matter.
Step one: the model
The helmet starts as a 3D model. Well-made cosplay files already come split into parts and include an inner shell sized for a head, but many downloaded models are decorative and need work before they become wearable. Typical preparation includes:
- Scaling to the wearer's head. A measurement around the head above the ears plus a few millimetres of clearance for padding sets the inner size.
- Splitting into printable sections. A 1:1 helmet is larger than most printer beds, so the skull is cut into two to four pieces and each horn is printed separately. Our guide to how big a 3D print can be explains how splitting works.
- Adding alignment features. Pegs, keys or flat mating faces make the parts line up cleanly during assembly.
- Hollowing the horns and spikes to save weight while keeping the walls thick enough to survive handling.
If you have a favourite version of the helmet from a specific game cinematic or artwork, the model can be adjusted or built from scratch. Fantasy Lab 3D offers custom modelling for exactly this kind of request.
Step two: material and finish
Our Arthas helmet was printed in marble PLA, a filament with fine dark speckles suspended in a pale base. On a helmet that is meant to look like enchanted, weathered metal and bone, the stone-like texture reads surprisingly well straight off the printer and hides layer lines better than a plain colour. You can read more about the effect in marble filament: how prints get that stone look.
Other options depending on how you plan to use the piece:
| Goal | Material | Why |
|---|---|---|
| Display shelf, minimal handling | PLA or marble PLA | Sharpest detail, easy to paint, lowest cost |
| Convention wear, occasional knocks | PETG | Tougher and less brittle than PLA, tolerates warm rooms |
| Painted "metal" finish | PLA plus primer and paint | Smooth base for filler, sanding and metallic paint |
Layer height matters too. A 0.2 mm layer keeps print time reasonable on such a large object, while 0.12 to 0.16 mm gives a smoother faceplate that needs less sanding before paint.
Step three: printing and assembly
A full-size helmet is a multi-day job even on a fast printer. The skull halves are printed with the open side down where possible to minimise supports (temporary scaffolding the printer builds under overhangs and removes later). Horns are oriented along their length so the layers run with the curve rather than across it, which is the single biggest factor in keeping them from snapping.
Once every part is off the printer, the pieces are:
- Cleaned of support material and test fitted dry.
- Glued with cyanoacrylate for small joints and two-part epoxy for the structural seam between skull halves.
- Pinned where a horn meets the skull, so the joint relies on a metal rod rather than glue alone.
- Filled at the seams, sanded and primed if a painted finish was ordered.
Our article on assembling multi-part prints covers the glues and pinning tricks in more detail.
Wearable or display: decide before you order
The same file can become two very different objects. A display helmet can be printed solid and heavy, with sharp spikes and no interior padding. A wearable one needs a comfortable inner cavity, foam or strap mounting points, ventilation, and a way to see out. Eye slots on the Arthas design are narrow, so many cosplayers add mesh or a tinted visor behind them.
Tell us how the piece will be used and we will recommend scale, wall thickness and material accordingly. Weight, finish and whether you want it painted all change the quote, so the price depends on size, material and level of finishing.
Ready to order?
Whether you want the Lich King on your shelf or on your head at the next convention, Fantasy Lab 3D can print it at 1:1 scale, in marble or any colour you choose, with or without a painted finish. Send us the model you have in mind, or just the idea, through the contact form, or message us on Instagram at @fantasylab3d.almaty and we will send a quote.
- #cosplay
- #arthas
- #warcraft
- #helmet
- #3d printing
- #props
Want this printed?
Send us a link, a file or a rough idea. We reply with a quote and a realistic timeline.