3D Printed Cosplay Props and Armor: What Can Be Made and How
A practical guide to 3D printed cosplay: helmets, armor plates, swords and accessories, which materials to choose, how parts are finished and how to order one.
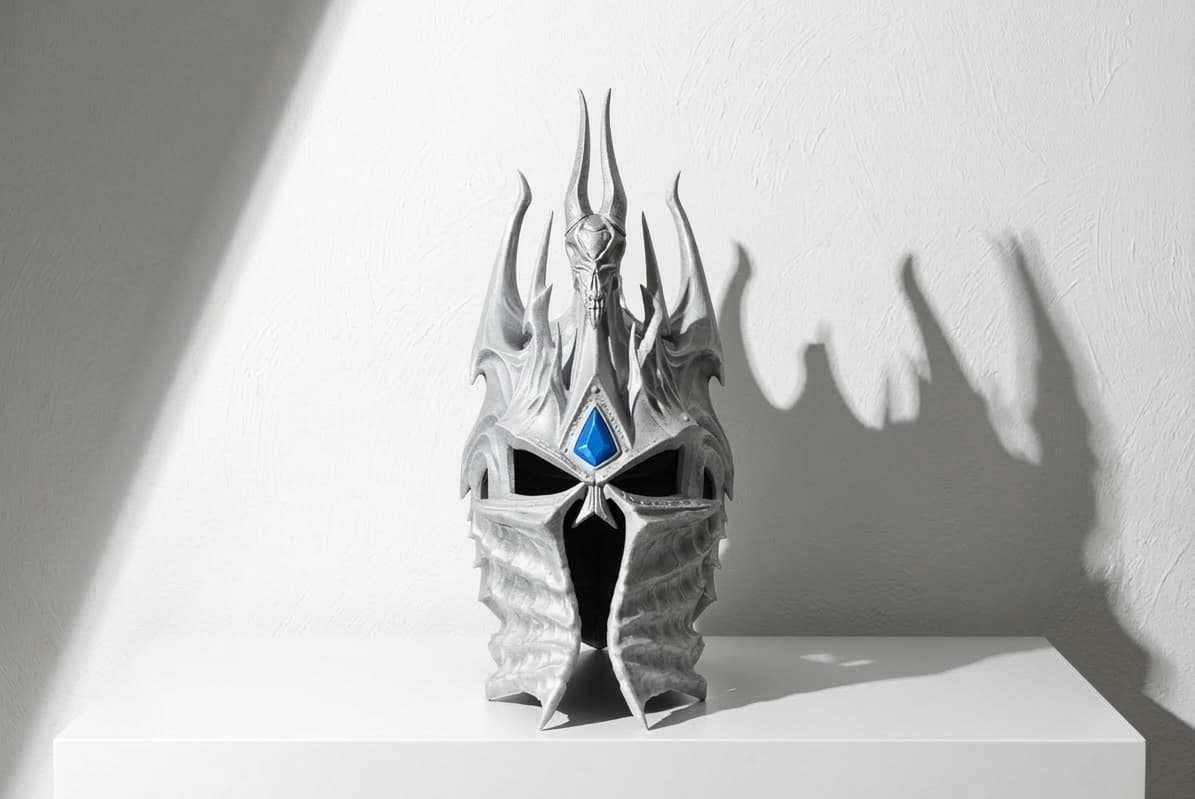
Ten years ago a cosplay helmet meant weeks of EVA foam, hot glue and hoping the shape came out symmetrical. Today the same helmet can be modelled once, printed in a few days and finished to look like real metal. This guide covers what 3D printing does well for cosplay, where it still needs a human hand, and what to tell a studio like Fantasy Lab 3D so you get a piece that fits and lasts.
What 3D printing does best in cosplay
Printing shines whenever a prop needs precise, repeatable, symmetrical shapes with fine detail. That includes:
- Helmets and masks, from sci-fi visors to fantasy skull faces like the 1:1 Arthas helmet we printed.
- Armor plates: shoulder pauldrons, chest pieces, gauntlets, greaves and belt buckles.
- Weapons and tools: swords, daggers, pistols, staff heads, wands and shields (blade edges are blunted and events usually require this anyway).
- Small accessories: badges, emblems, jewellery, buttons, hair ornaments and belt fittings.
- Mechanical parts: hinges, clasps, visor pivots and mounting brackets that hold foam or fabric parts in place.
Long, soft or very large items (a full cape, a two-metre pole) are still better made from fabric, wood or PVC pipe, often with printed fittings on the ends.
Choosing the material for each part
A costume rarely uses one material. The table below is the starting point we use when planning an order.
| Part | Recommended material | Reason |
|---|---|---|
| Helmet, mask | PLA or PETG | PLA prints sharpest; PETG survives heat and knocks better |
| Armor plates | PETG or PLA with thin walls | Light, tough enough for a full day of wear |
| Sword or staff | PETG over a metal or wooden core | Prevents snapping at the handle |
| Fine emblems, jewellery | Resin (SLA) | Crisp text and textures at small scale |
| Flexible straps, grips | TPU | Rubber-like, bends without breaking |
PLA is the default for display pieces and anything that will be painted, because it holds detail and sands well. PETG is the better choice if the item will be worn outdoors in summer or packed tightly in a suitcase. Our PLA vs PETG vs ABS comparison goes deeper on the trade-offs. For small, ultra-detailed pieces, resin printing is worth the extra care, as explained in FDM vs resin printing.
Scaling to the wearer
The most common cosplay disappointment is a helmet that does not go on or a gauntlet that pinches. Before a file goes to the printer, it should be scaled to the person who will wear it. We ask for a few measurements depending on the part:
- Head circumference above the ears, plus a note on whether you will wear a wig or balaclava underneath.
- Forearm and wrist circumference for gauntlets and bracers.
- Shoulder width and upper arm circumference for pauldrons.
- Height, so a weapon or staff looks proportional in photos.
Add two to five millimetres of clearance for padding and movement, and remember that paint and primer add a little thickness on mating surfaces.
Splitting, printing and joining
Most armor and helmet models are larger than a printer bed, so they are split into sections and glued after printing. Good splitting hides seams along natural lines of the design, such as panel edges or trim, and adds pegs so the parts register precisely. Inside surfaces get thin walls with light infill to keep weight down; outside surfaces are printed with the smoothest side facing up or out so they need less sanding.
Print time for a full set of armor runs into days, not hours. A single pauldron may take most of a day, and a helmet several. Planning six to eight weeks before a convention is comfortable; two weeks is possible for smaller items but leaves no room for revisions.
Finishing: where the magic happens
A raw print is a great shape, but it still looks like plastic. Finishing turns it into a prop:
- Remove supports and sand the surface, starting coarse and moving to fine grit.
- Fill seams and layer lines with filler primer or a spot putty, then sand again.
- Prime, paint the base colour, then add metallic layers, washes for depth and dry-brushed highlights on edges.
- Seal with a matte or satin clear coat so the paint survives sweat and handling.
You can order a print raw and finish it yourself, or ask for it primed, painted or fully weathered. Our guide to post-processing: sanding, priming and painting explains each stage. Fantasy Lab 3D can take a prop all the way to convention-ready if you would rather spend your time on the costume itself.
Files and permissions
Many cosplay models are sold by prop designers on marketplaces, and their licences typically allow personal use, including having a studio print your copy. If the model comes from a fandom with strict rights holders, we will say so honestly before starting. Fantasy Lab 3D can also model a prop from reference images if no file exists, which is common for lesser-known characters or original designs.
Ready to order?
Tell us the character, the parts you need, your measurements and the date of your event, and we will suggest materials, a finish level and a timeline. Reach us through the contact form or send a DM on Instagram at @fantasylab3d.almaty. Prices depend on size, material and finishing, so every prop is quoted individually.
- #cosplay
- #props
- #armor
- #3d printing
- #conventions
- #costumes
Want this printed?
Send us a link, a file or a rough idea. We reply with a quote and a realistic timeline.